1 - Best practices and first playbook
Prerequisites
Create a directory somewhere in your filesystem named ansible_1.
Important
For the purposes of the tutorial I’ll assume it was created on ~/ansible_1.
(.venv) $ mkdir ~/ansible_1
Change directories to the previously created directory.
(.venv) $ cd ~/ansible_1
(.venv) ~/ansible_1 $
Note
Remember to activate your Python virtual environment with: $ source ~/.venv/bin/activate.
Create a role to provision the popular nginx webserver with a sample page
The way to think about a role is as a pre-defined set of tasks that can be controlled with parameters, and included in the plays, which are included on a playbook file.
Role webservers-nginx
We will name the role to be created as webservers-nginx. To proceed let’s create the minimum required directory structure for the role:
Create the file
webservers-nginx/tasks/main.yml(.venv) ~/ansible_1 $ mkdir -p roles/webservers-nginx/tasks/ (.venv) ~/ansible_1 $ touch roles/webservers-nginx/tasks/main.yml
Include the following content in the file
main.yml(careful with the spaces: YAML is very sensitive with this)1 2 3 4 5 6 7 8 9 10 11 12
--- - name: install the nginx reverse proxy apt: name: nginx update_cache: yes - name: enable nginx service systemd: name: nginx state: started enabled: yes
Warning
Do not use tabs as YAML doesn’t support them (see here).
In this example we’re just installing the popular webserver nginx, starting it, and enabling the service at boot time (so if we reboot the destination host, this service will be auto-started).
Create a playbook to use the role
Playbooks are the next level of abstraction towards the infrastructure. They include plays. A play can include tasks, and most importantly, roles.
Until now we don’t have any hosts to use as target to run the playbook that will have included the role webservers-nginx, that’s about to change.
Creating a virtual machine using Vagrant
With Vagrant we can spin up virtual machines easily. In this case we will spin up a particular Ubuntu Xenial image. See below:
Initialize vagrant with an ubuntu image:
(.venv) ~/ansible_1 $ vagrant init bento/ubuntu-16.04 --minimal
Note
This will create the file ‘Vagrantfile’.
Open the auto-generated
Vagrantfile, and make sure the content looks like this:1 2 3 4 5
Vagrant.configure("2") do |config| config.vm.box = "bento/ubuntu-16.04" config.vm.network "private_network", ip: "10.100.0.2" config.vm.hostname = "tutorial-1" end
Start the virtual machine
(.venv) ~/ansible_1 $ vagrant up
Note
Time to get a cup of tea while this is done.
The steps above will help to create a local virtual machine that we can use to run our Ansible playbook against. This helps in the way that you don’t (and shouldn’t) need to target your important infrastructure to test a particular playbook (careful with this!).
Because Vagrant is using VirtualBox as a default virtualizer, if you open the virtual box user interface you should see the machine we just created running.
The Vagrant box we just installed can be found here. This image by default has the following ssh credentials:
- Username:
vagrant - Password:
vagrant(normally)
How to SSH into a Vagrant VM
There are at least three ways of doing this
Using
vagrantFrom the same directory the Vagrantfile is located, run:
(.venv) ~/ansible_1 $ vagrant ssh
SSH to the forwarded port on localhost
When the machine was provisioned, an output similar to this was shown:
[...] ==> default: Forwarding ports... default: 22 (guest) => 2222 (host) (adapter 1) ==> default: Booting VM... ==> default: Waiting for machine to boot. This may take a few minutes... default: SSH address: 127.0.0.1:2222 [...]
This means that to SSH to the vagrant VM you can simply do (using password):
(.venv) ~/ansible_1 $ ssh -p 2222 vagrant@localhost
Or using the generated private key:
(.venv) ~/ansible_1 $ ssh -p 2222 -i .vagrant/machines/default/virtualbox/private_key vagrant@localhost
Classic SSH to the host
Use the IP provided in the config (using password):
(.venv) ~/ansible_1 $ ssh vagrant@10.100.0.2
Or using the generated private SSH key:
(.venv) ~/ansible_1 $ ssh -i .vagrant/machines/default/virtualbox/private_key vagrant@10.100.0.2
Simple inventory file
The playbook we are going to create needs an inventory file, therefore we will create simple one for now (this will be covered better in the next chapter).
Create the inventor file:
(.venv) ~/ansible_1 $ touch inventory.ini
Include the following content in the file:
1 2 3 4 5 6 7 8
[nginx_webservers] 10.100.0.2 [all:vars] ansible_connection=ssh ansible_user=vagrant ansible_ssh_private_key_file=.vagrant/machines/default/virtualbox/private_key ansible_ssh_common_args='-o StrictHostKeyChecking=no'
After we have the inventory file, and the infrastructure ready, we are ready to create our first playbook.
Create the file
webservers.yml:(.venv) ~/ansible_1 $ touch webservers.yml
Include the following content in the file:
1 2 3 4 5 6
--- - hosts: nginx_webservers become: true roles: - webservers-nginx
Test the connectivity to the local VM using this ad-hoc command:
(.venv) ~/ansible_1 $ ansible -i inventory.ini -m ping all
Output:
1 2 3 4
10.100.0.2 | SUCCESS => { "changed": false, "ping": "pong" }
Run the playbook:
(.venv) ~/ansible_1 $ ansible-playbook -i inventory.ini webservers.yml
Output:
1 2 3 4 5 6 7 8 9 10 11 12 13 14 15
PLAY [nginx_webservers] ************************************************************************************************************************************************ TASK [Gathering Facts] ************************************************************************************************************************************************* ok: [10.100.0.2] TASK [webservers-nginx : install the nginx reverse proxy] ************************************************************************************************************** changed: [10.100.0.2] TASK [webservers-nginx : enable nginx service] ************************************************************************************************************************* ok: [10.100.0.2] PLAY RECAP ************************************************************************************************************************************************************* 10.100.0.2 : ok=3 changed=1 unreachable=0 failed=0
From the following output we can conclude that:
- The only task that changed our infrastructure was the installation of nginx
- The installed version of Nginx is enabled by default, therefore Ansible didn’t have to enable the service
- In summary: only 1 item was changed
If the playbook is ran repeatedly, the state on the remote server should be the same (this is called idempotence).
(.venv) ~/ansible_1 $ ansible-playbook -i inventory.ini webservers.yml
Output:
1 2 3 4 5 6 7 8 9 10 11 12 13 14 15
PLAY [nginx_webservers] ************************************************************************************************************************************************

TASK [Gathering Facts] *************************************************************************************************************************************************
ok: [10.100.0.2]

TASK [webservers-nginx : install the nginx reverse proxy] **************************************************************************************************************
ok: [10.100.0.2]

TASK [webservers-nginx : enable nginx service] *************************************************************************************************************************
ok: [10.100.0.2]

PLAY RECAP *************************************************************************************************************************************************************
10.100.0.2                 : ok=3    changed=0    unreachable=0    failed=0
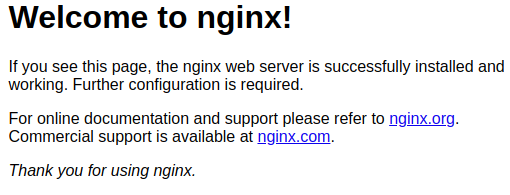
To confirm everything has worked fine, if you access http://10.100.0.2 this should display the popular Nginx default welcome page:
Nginx default site (welcome page)